Guide
A batch RAW to JPEG converter for Mac, built for web delivery
Archyv turns a folder of RAW files — mixed brands included — into correctly sized sRGB JPEGs in one pass, from a saved recipe, with your originals left untouched.
A RAW file is the right thing to keep and the wrong thing to publish. Browsers cannot display one, mail clients choke on the size, and every camera brand has its own flavour — CR3, NEF, ARW, RAF, DNG — none of which a client or a web page has any business receiving. Sooner or later a folder of them has to become a folder of JPEGs. Done one file at a time, that is an afternoon; done as a batch, it is a few minutes.
Archyv is a Mac app that does the batch: select the RAW files, choose a template, and it writes correctly sized sRGB JPEGs into a folder of your choosing in one pass, with the originals untouched and the metadata handled the way you decided — credit kept, location dropped. Below: what converting a RAW file actually does, how the conversion is set up, the three settings that decide how the photos look online, the metadata choice, and saving the recipe — and, at the end, what Preview, Photos and sips get you if you would rather not install anything.
What converting a RAW file actually does
A RAW file is not a picture yet. It is the sensor’s data plus a small embedded preview, and it has to be rendered — demosaiced, white-balanced, tone-mapped, sharpened — before anything can show it. Every converter does that rendering, and no two do it identically, which is why the same NEF looks slightly different in Lightroom, Capture One and Apple Photos.
That distinction decides which tool to use. If a shoot has been edited in Lightroom or Capture One, export from there: the edits are the point, and only the editor knows them. A batch converter is for everything else — the straight renders: proof sets, contact sheets, a client’s first look, an archive’s browsable copies, the eighty percent of frames that will never be individually edited but still need to be seen.
Archyv renders RAW files with macOS’s own camera support — the same rendering Preview and Photos use — for every brand Apple supports, and carries a bundled decoder for the few it does not, such as Sigma’s X3F and Phase One’s IIQ. Twenty RAW formats are accepted as conversion input, and a mixed folder of brands converts in one run.
Setting up the conversion in Archyv
Select the RAW files — mixed brands are fine — and choose Image Conversion from the process bar. It asks for a destination folder first, because conversion writes new files and never touches the source. Then choose a template from the menu.
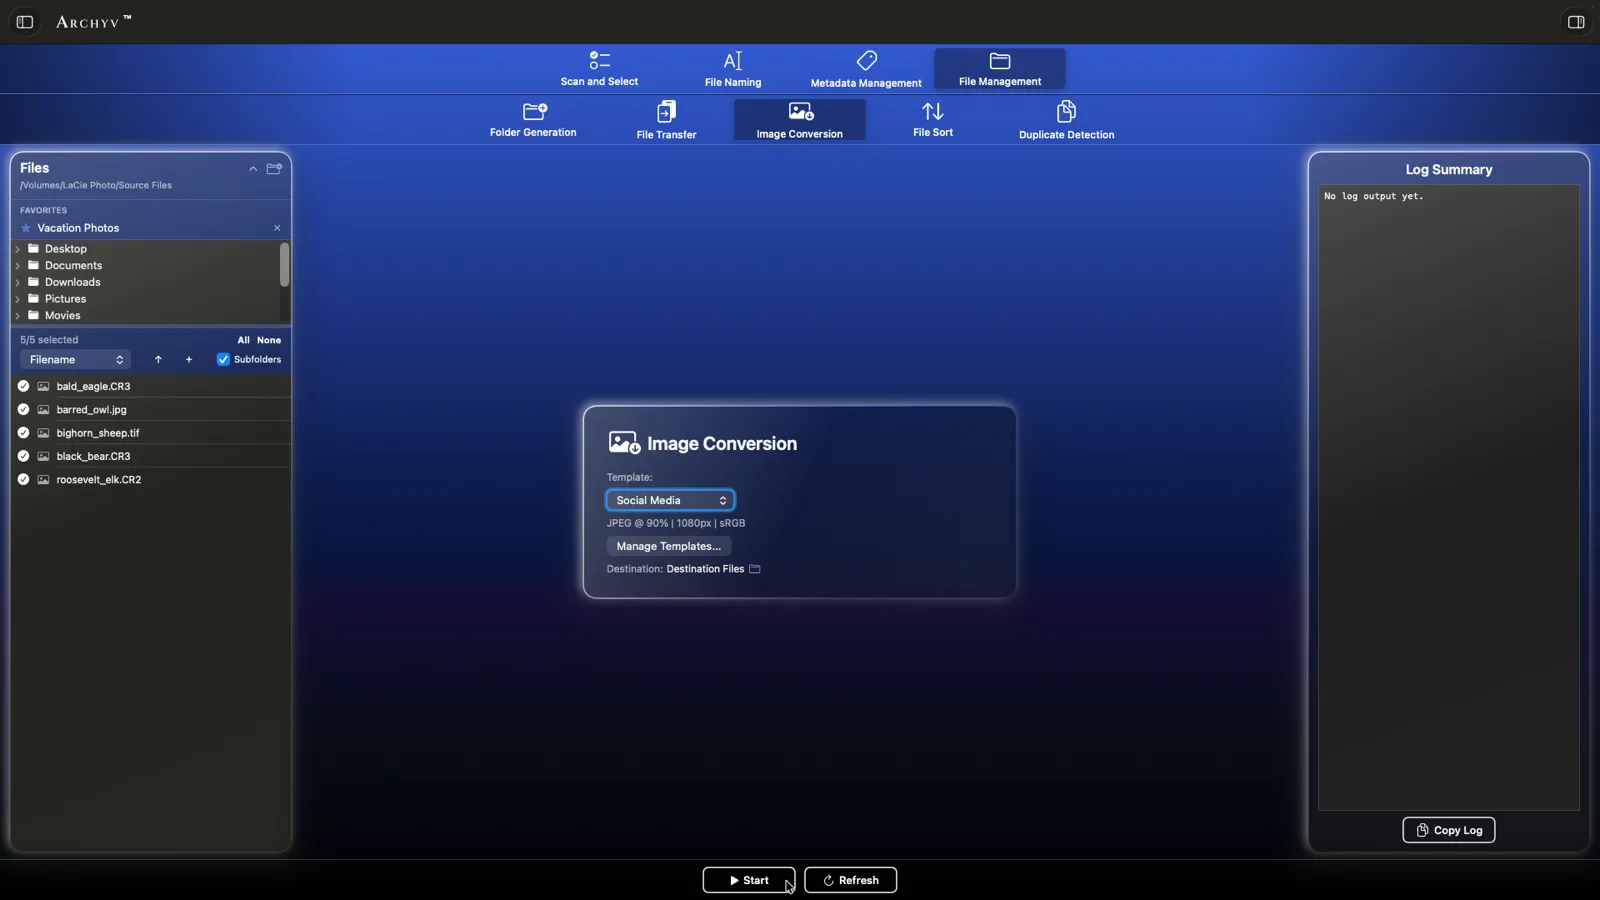
The built-in Web Optimized template is the right default for a gallery: JPEG at 85% quality, 2048 pixels on the longest edge, sRGB. The one-line summary under the menu tells you what you are about to get before you get it. Press Start, and the log reports each file as it converts; the finished JPEGs land in the destination, named from the template’s pattern.
Video files in the selection are skipped with a note in the log, so a mixed folder needs no sorting first.
Size, quality and colour: the three settings that matter online
Size. 2048 pixels on the longest edge is plenty for a gallery and most portfolio themes; 1080 suits social platforms, which resize anyway. A 6000-pixel JPEG on a web page is nothing but a slow page. Longest Edge constrains the long side and keeps the aspect ratio; Fit Within Box keeps both sides under a limit, which is what you want when a platform specifies a width and a height.
Quality. JPEG quality is a percentage, and 85 is the sweet spot: visually indistinguishable from higher settings at web sizes, at a fraction of the file size. Use 90 or above for the frames that matter and 75 or below for thumbnails.
Colour space. Browsers and phones assume sRGB. Export in Adobe RGB and the image looks flat and dull on every screen that does not colour-manage — which is most of them. Keep Adobe RGB for print, Display P3 for Apple screens, and sRGB for the web.
DPI does not affect a web image at all; 72 is conventional and harmless.
Metadata: keep the credit, drop the location
A JPEG carries metadata, and what travels with it is a choice. A template offers six ways to handle it — keep everything, strip everything, or keep or remove particular groups — and two of them are worth understanding before anything goes public.
Keep the creator and copyright. An image that leaves with your name, copyright line and contact details in its IPTC fields can be traced back to you when it turns up somewhere it should not. Preserving metadata is how that credit travels with the file.
Strip GPS only. The same file may carry the exact coordinates of your home, a nest site or a client’s property. Strip GPS Only removes the location and keeps the rest — the right setting for anything going public, and the built-in Social Media template applies it.
A watermark adds a visible credit on top: text built from metadata variables such as {copyright}, {artist} and {year}, or a transparent logo, in any of nine positions at the opacity you choose. Bottom-right at 50 to 70% opacity is the least intrusive.
Saving the recipe
The built-in templates are locked, so duplicate one to make your own. Change the size, quality, colour space, metadata handling, watermark and output naming, and give it a name that says where the files are going — Client proofs, 1600, watermarked or Portfolio, 2048. The Conversion Templates tab holds them, and from then on that delivery is one choice in the menu.
Output naming is part of the recipe. {original} keeps the source name, {original}_web labels the output, and {seq:4} adds a counter if names might collide. Templates export and import as files, so a studio can share one recipe and every seat delivers the same way.
Your RAW files stay where they are
Conversion never rewrites your RAW files. It writes new JPEGs into the destination and leaves the source untouched, so there is nothing to undo on the originals — and a run you dislike is deleted from the destination, not recovered from the source. Name clashes in the destination are resolved automatically rather than by overwriting. Allow disk space for the output, and more of it if the template writes TIFF or PNG, which run larger than JPEG.
Where Preview, Photos and sips stop
If you would rather try the built-in tools first, here is what each one covers.
Preview opens most RAW files and exports a JPEG with a quality slider, and for a handful of files that is genuinely enough. There is no saved recipe, no colour-space choice, no say over metadata, and each new folder means setting it all up again. Apple Photos exports well — JPEG, a size and a quality — but only for photos imported into its library first; if your archive is a folder tree, that means pulling thousands of RAW files into a database you do not otherwise use, then exporting them back out.
sips, the command-line image tool on every Mac, converts a folder in one line:
sips -s format jpeg -s formatOptions 85 -Z 2048 *.NEF --out /path/to/outputIt is fast and free. It is also a command with no preview, no settings for metadata, watermarks or naming, and no memory: the next folder means retyping it. Shortcuts can do the same job with a little assembly — the HEIC guide walks through it, and the approach is identical for RAW.
What none of them keep is the recipe. Size, quality, colour space, metadata handling and naming decided once and applied to every folder after it is the whole difference between a delivery and a chore — and that is what the template in Image Conversion is for.
Next: the Image Conversion reference covers every format, sizing mode, colour space and metadata option, and Conversion Templates covers building your own. For the newer formats that beat JPEG on size, see converting to AVIF and JPEG XL on a Mac.